Step-by-Step Embroidery Guide for Delicate Fabrics Easy Techniques

Unlocking the Art of Embroidery
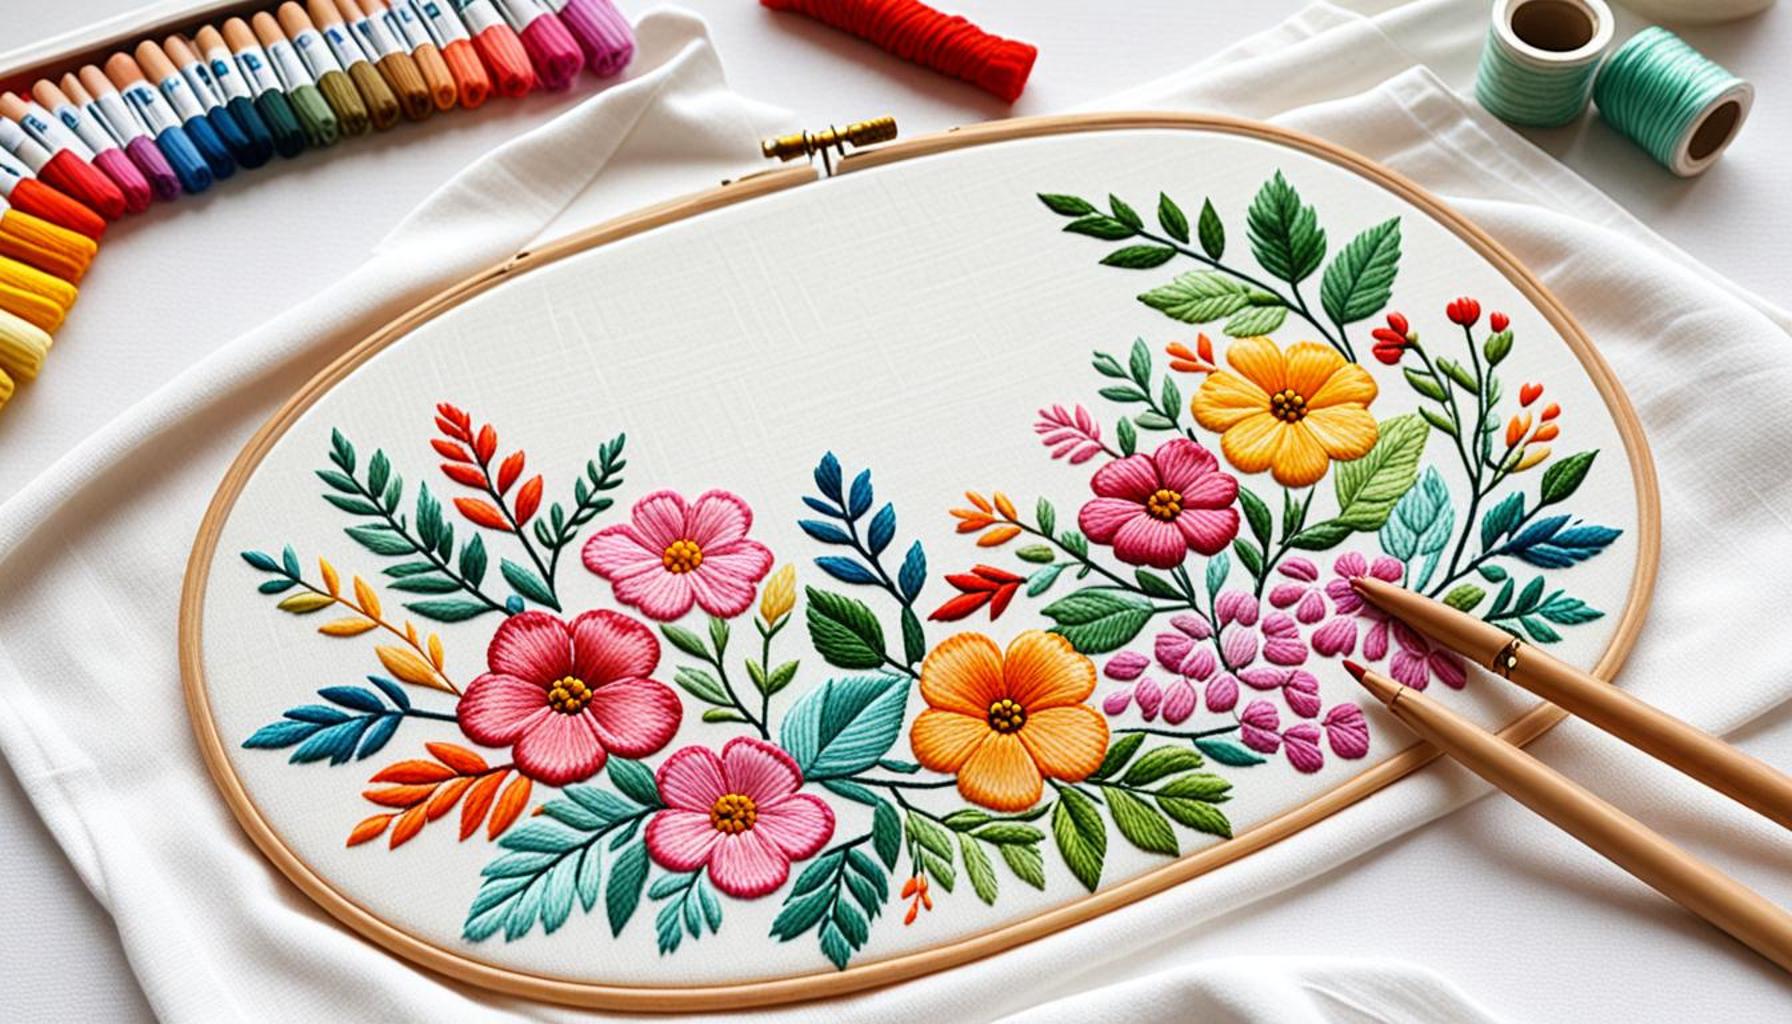
Embroidery is an exquisite craft that allows you to transform delicate fabrics into stunning works of art. Whether you are a novice or seasoned creator, mastering the right techniques can make all the difference. This step-by-step embroidery guide will equip you with essential methods tailored for delicate materials.
Why Focus on Delicate Fabrics?
Working with lightweight materials requires precision and care. Delicate fabrics, such as:
- Silk—known for its luxurious sheen and smooth texture, silk is often used in high-end clothing and accessories. It requires a gentle touch to avoid snagging, and choosing the right thread can enhance its natural luster.
- Organza—this sheer fabric adds elegance to any embroidered piece. Its stiff nature can support intricate designs, but be mindful of the tension while stitching to prevent puckering.
- Lace—lace combines beauty and complexity, making it a favorite for delicate embroidery. Understanding how to stitch within the intricate patterns is crucial for achieving seamless results.
These fabrics often pose unique challenges, including fraying edges and a tendency to shift during the embroidering process. However, the intricate beauty they offer makes them well worth the effort. Understanding these fabrics helps you select the appropriate threads and stitches for your projects, allowing your creativity to flourish.
What You’ll Learn
This guide dives into easy-to-follow techniques that will enhance your embroidery skills. Here’s what you can expect:
- Essential tools for delicate fabric embroidery— Invest in a quality pair of embroidery scissors, a fine needle, and a variety of threads suitable for lightweight fabrics. Specialty needles like size 9 or 10 can be especially helpful for silk and lace.
- Step-by-step instructions for various stitches— From basic running stitches to more complex French knots, mastering a range of stitch types can open the door to a world of creative possibilities. For instance, consider using a satin stitch on silk to create a beautifully smooth surface.
- Tips for prepping and hoisting delicate fabrics— Proper preparation is key when working with fragile materials. Stabilizers can provide much-needed support and prevent distortion while you work. Always use a fabric-specific hoop to ensure you maintain the fabric’s integrity.
With the right techniques at your fingertips, you’ll be ready to create breathtaking pieces that catch the eye and ignite conversation. Whether you are embellishing a garment with floral patterns or crafting decorative home accessories, embroidery offers a uniquely satisfying outlet for your creativity. Dive into this craft, and build your confidence as you transform delicate fabrics into stories stitched with love.
SEE ALSO: Click here to read another article
Essential Tools for Delicate Embroidery
Before you embark on your embroidery journey, gathering the right tools for delicate fabric embroidery is essential. The quality of your materials can greatly affect the outcome of your work, especially when dealing with fine textiles. Here are some indispensable tools that can make your embroidery experience smoother and more enjoyable:
- Embroidery Scissors—A sharp pair of embroidery scissors is crucial for making precise cuts and trimming threads without fraying your fabric. Look for scissors with a pointed tip to navigate the intricacies of delicate materials.
- Embroidery Needles—Choosing the right needle is vital for working with fabrics like silk and lace. Opt for size 9 or 10 needles as they are fine enough to prevent damaging your fabric while still providing adequate strength for stitching.
- Embroidery Thread—Select threads that complement the delicate nature of your fabric. Consider using cotton or silk threads specifically designed for embroidery. These threads not only enhance the aesthetic appeal but also provide the necessary strength without weighing down the fabric.
- Embroidery Hoops—Stabilizing your fabric is key to achieving clean and even stitches. A fabric-specific hoop helps maintain tension without warping or distorting delicate materials. Choose a hoop that securely holds your fabric while allowing room for your hands to maneuver comfortably.
- Stabilizers—Using stabilizers can greatly improve the stability of your embroidery project. They act as a support system, preventing the fabric from shifting or stretching during stitching. Fabric types like cutaway or tear-away stabilizers are commonly recommended for delicate projects.
Step-by-Step Instructions for Various Stitches
Once you have gathered your tools, the next step in your embroidery journey is mastering a variety of stitches. Each stitch has its unique charm and application, especially when working with delicate fabrics. Here are some fundamental stitches to consider incorporating into your projects:
- Running Stitch—This basic stitch involves a simple forward motion that creates a dashed line. It’s perfect for outlining shapes or adding texture without overwhelming the fabric.
- Satin Stitch—Ideal for filling in shapes and creating smooth surfaces, the satin stitch is especially effective on silk. Use a straight, close stitching technique to achieve a lustrous finish.
- French Knots—Adding dimension and a touch of elegance, French knots are great for floral designs and accents. While they may seem tricky at first, practice will yield beautiful results that elevate your embroidery work.
- Back Stitch—This stitch offers both strength and definition, making it perfect for outlining designs. Its versatility allows it to shine on a variety of delicate fabrics.
Understanding the fundamental stitches lays the foundation for more advanced techniques that will enrich your embroidery repertoire. As you gain confidence in your stitching skills, feel free to experiment with combining different stitches to create unique textures and patterns.
| Technique | Advantages |
|---|---|
| Basic Stitches | These foundational skills enhance control while working on delicate fabrics, making intricate designs achievable. |
| Hooping Methods | Proper support ensures that fine materials are secured, preventing puckering or distortion during sewing, leading to professional-looking outcomes. |
| Stabilizers | Using the right stabilizer can support delicate threads without added bulk, allowing for clean finishes and easy thread removal. |
| Thread Selection | Choosing high-quality threads specifically designed for soft fabrics reduces friction and thread breakage, ensuring smooth stitching. |
Embarking on your embroidery journey with delicate fabrics becomes seamless when mastering these techniques. Each technique not only improves your craft but also equips you with the confidence to tackle more sophisticated designs. As you explore different fabrics and stitches, remember that persistence is key; practice will undoubtedly enhance your skills. For further insights, consider sourcing additional resources, such as professional tutorials and community forums, where you can share experiences and tips. By diving deeper into these embroidery techniques, you’ll unlock a world of creativity and artistic expression unique to delicate fabrics.
CHECK OUT: Click here to explore more
Preparing Your Fabric for Embroidery
Once you have all the essential tools and have familiarized yourself with basic stitches, the next critical step in the embroidery guide for delicate fabrics is preparing your fabric for successful stitching. Ensuring that your fabric is primed for embroidery can significantly enhance the clarity and durability of your work.
Start by washing and ironing your fabric. If the fabric is new, it may contain sizing or finishes that could interfere with the embroidery process. Washing it gently allows you to remove these residues. Be sure to use a mild detergent and cold water to prevent shrinkage or color bleeding. After washing, iron your fabric on a low setting to smooth out wrinkles, which can disrupt the alignment of your design.
Next, it’s essential to select the right design placement. For delicate fabrics, using a fabric marking pen or chalk to outline where your stitching will go can help ensure precision. Opt for markings that dissipate easily after stitching — water-soluble fabrics, for instance, will vanish with a little moisture, leaving only your beautiful embroidery behind.
Using Stabilizers Effectively
As mentioned previously, applying a stabilizer is vital for managing delicate fabrics. The stabilizer adds support and keeps the fabric from shifting during stitching. For delicate embroidery projects, lightweight options like water-soluble stabilizers are often preferred, as they don’t add bulk. They dissolve away easily, ensuring your final piece maintains its intended drape and softness.
When using stabilizers, ensure that you affix them securely to the back of your fabric before starting your embroidery. You may use temporary adhesive spray to help hold it in place without creating excess stiffness. Always check the manufacturer’s instructions, as different stabilizers may have specific application methods.
Choosing Thread Colors and Types
The choice of thread can make or break your project, especially on delicate fabrics. Consider using variegated threads or those with a subtle sheen to enhance the visual interest of your embroidery without overwhelming the fabric’s natural beauty. Cotton threads are an excellent choice for softness, while silk threads offer a luxurious finish. However, it’s crucial to select threads that won’t snag or catch in the delicate weave of your fabric.
Don’t shy away from experimenting with thread blending. By combining two or more thread types, you can achieve unique effects that can elevate the design. Ensure that the thread colors you choose contrast nicely with your fabric. Bright colors pop beautifully against lighter backgrounds, while harmonious tones offer a soft, elegant finish.
Maintaining Care During Stitching
When you begin stitching, take your time and practice patience. For delicate fabrics, gentle handling is key. Avoid pulling the thread too tightly, as this can cause puckering or distortion. Keep a steady hand and try to maintain an even tension while stitching. If you notice any puckering, it’s recommended to loosen your grip slightly to allow the fabric to lay flat.
Additionally, always keep your workspace clean, free of leftover threads and lint, as these can contaminate your delicate embroidery work. Regularly change your needle to maintain sharpness, as dull needles can wreak havoc on fine fabrics.
With these preparations and considerations in mind, you’ll find that your embroidery projects on delicate fabrics not only become more manageable but also more enjoyable and fulfilling! The art of embroidery is a delicate dance between technique and creativity, so embrace the process with enthusiasm and patience.
SEE ALSO: Click here to read another article
Conclusion
In conclusion, mastering the art of embroidery on delicate fabrics necessitates a blend of preparation, technique, and creativity. As we’ve explored in this step-by-step embroidery guide for delicate fabrics, the foundation of a successful project lies in carefully preparing your fabric, choosing the right tools, and employing effective techniques. Whether you are a seasoned embroiderer or a novice venturing into intricate fabrics, understanding the importance of washing and stabilizing your materials will enhance the overall quality of your work.
The selection of thread is equally crucial, as it can breathe life into your designs without overshadowing the softness of the fabric. Emphasizing the use of compatible threads, experimenting with colors, and maintaining a gentle touch during stitching helps ensure that your final piece not only looks exquisite but also feels harmonious.
Furthermore, nurturing patience and attention to detail throughout the embroidery process allows for a seamless experience. Every stitch becomes a testament to the artistry of your hands, a reflection of your personal style woven intricately into the delicate fibers.
As you embark on your embroidery journey with delicate fabrics, remember that the true joy lies in the creative process. Embrace the challenges, seek inspiration, and don’t shy away from experimenting with new techniques. By doing so, you will not only expand your skill set but also unlock a world of possibilities, ultimately transforming every project into a unique work of art. So gather your materials, ignite your imagination, and let the threads weave your story beautifully!


